([card]Kaalia of the Vast[/card] | Art by Michael Komarck)
Epic Preparations
Good morning, EDHREC! I’m Bernardo Melibeu and this is Epic Experiment, a series where we throw all common sense aside and experiment with some unusual cards, effectively changing how we normally build our deck. Is it going to work? Who knows?! We’re making science here. When you’re an Izzet mage, blowing things up in front of your own face is half the fun.
In this article we'll be exploring a very scary commander, whose build can vary between 3 different tribes! That's right, today we'll build a [card]Kaalia of the Vast[/card] deck.
As usual, let's start it off by analyzing our commander.
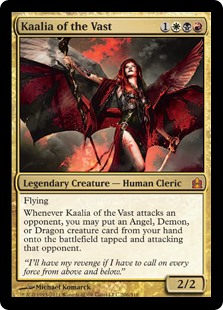
Whenever Kaalia of the Vast attacks an opponent, you may put an Angel, Demon or Dragon creature card from your hand onto the battlefield tapped and attacking that opponent.
Observation 1:
Having these three tribes to choose from gives us a lot of flexibility in how to build our deck (we can choose how we're going to focus our creature suite)
Observation 2:
Each tribe has its unique traits. Angels are more defensive, Dragons are the best at beatdown, and Demons lead to more degenerate gameplay.
Observation 3:
Since all of these tribes are very color intensive, it's wise to focus on one or maybe two of them.
The Old Formula
With that in mind, let’s head to Kaalia’s EDHREC page and see how she’s usually built:
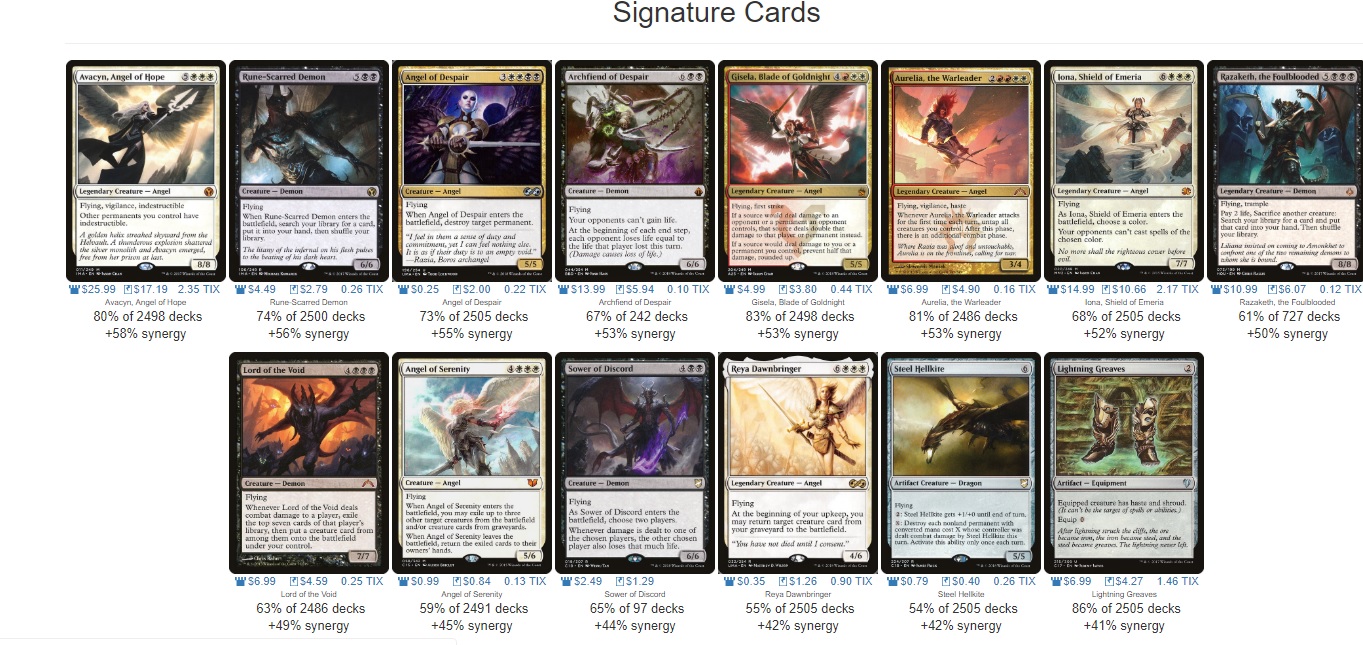
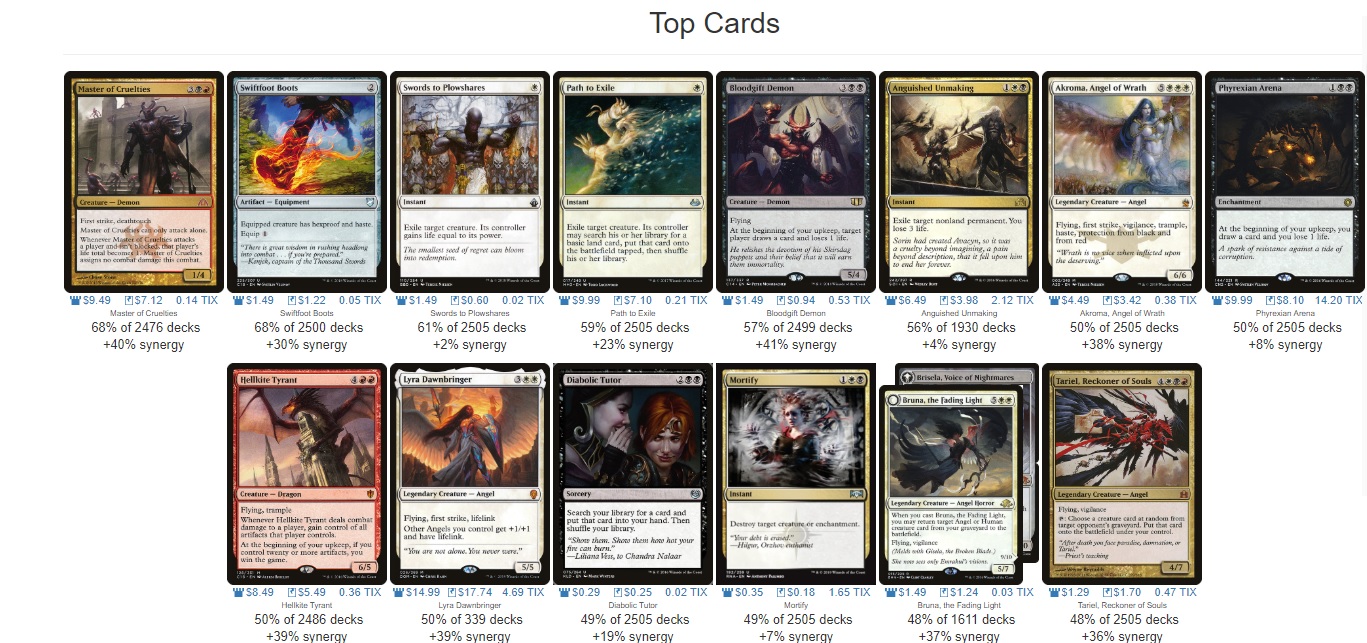
As we can see from this list, there're a bunch of juicy targets to cheat into play and most of them can lead us to their own strategy (like [card]Avacyn, Angel of Hope[/card]). The rest of the cards are basically the usual BW removal suite.
It's interesting to note how underrepresented the Dragon tribe is, with only 2 slots in those lists.
The Epic Ingredients
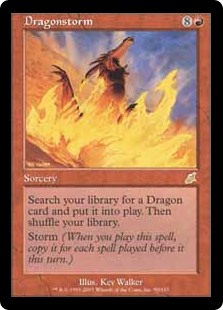
Having the ability to cheat Dragons into play gives Kaalia a very unique opportunity: that of a [card]Dragonstorm[/card] commander. For those unfamiliar, [card]Dragonstorm[/card] is often paired with a bunch of red ritual effects (such as [card]Seething Song[/card]) to put a bunch of awesome creatures into play out of nowhere and topple the opposition.
One problem that I constantly have when building around [card]Dragonstorm[/card] is that I have to put enough Dragons on my deck to be able to have a reliable [card]Dragonstorm[/card], but, at the same time, I don't want to draw them, since they'll be dead cards until the late game. Kaalia is a nice back up plan and, in the worse case, can be an useful removal bait before we combo off.
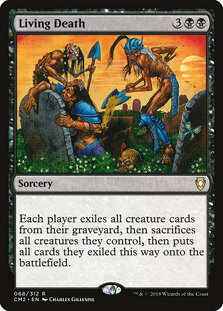
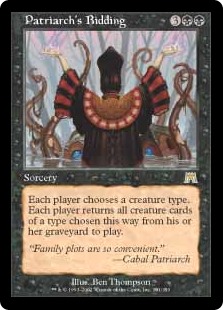
While our commander can help smooth out bad draws, we need a faster way to put our Dragons from our hand into play. This is where having access to black really help, as we can use mass reanimation, like [card]Living Death[/card] and [card]Patriarch's Bidding[/card], combined with loot and wheel effects. This is another awesome way to bring a bunch of awesome creatures into play. Though this line makes us susceptible to graveyard hate, it's usually easier to pull off since it doesn't rely on casting a nine-mana spell.
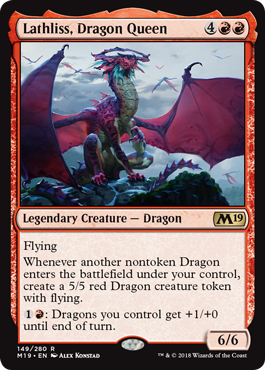
One of the most important aspects of this deck is our Dragon suite. They need to have powerful effects, and after a successful combo to finally bring them all into play, we need to be able to either end the game or at least eliminate some problematic players. M19 introduced what is, in my opinion, the best Dragon ever printed for this strategy: [card]Lathliss, Dragon Queen[/card]. Getting her into play means that every other Dragon we play is an automatic two-for-one. Plus, her pump ability is a good way to spend leftover mana from our rituals.
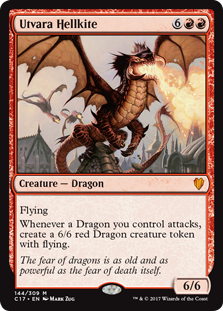
[card]Dragonlord Kolaghan[/card] is also a very important piece of our combo, as she is a haste enabler that we can tutor with Dragonstorm. [card]Utvara Hellkite[/card] is the last of the must-have Dragons, since it basically guarantees a two turn clock on most opponents. It can also help us one-shot the table if we have [card]Purphoros, God of the Forge[/card] or [card]Dragon Tempest[/card] in play.
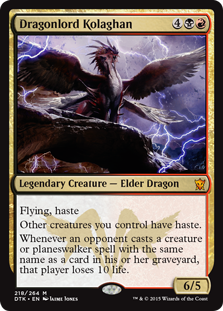
The rest of the Dragon suite is more flexible, but in general we should choose utility over raw damage. [card]Balefire Dragon[/card] board wipes when it deals damage. [card]Bladewing the Risen[/card] helps getting back a key Dragon if we've been looting or rummaging. [card]Bogardan Hellkite[/card] acts as a burn spell that combos well with [card]Knollspine Dragon[/card]. [card]Boltwing Marauder[/card] and [card]Kolaghan, the Storm's Fury[/card] both help us punching through on the combo turn. [card]Dragon Mage[/card] and [card]Skyline Despot[/card] are good when cheated into play, since they give us incremental advantages. [card]Hellkite Charger[/card] and [card]Scourge of the Throne[/card] are extra combat step enablers. The former is better in an attrition game (where it stays on the battlefield and we get to pay the mana), while the second is a great tool for the combo turn.
Aside from turning our Dragon army sideways, we have a few noncombat ways to win the game: [card]Dragon Tempest[/card] (which is really good with our commander), [card]Impact Tremors[/card], and [card]Purphoros, God of the Forge[/card].
The Mixture
Dragonstorm Kaalia
View on ArchidektCommander (1)
- 1 * Kaalia of the Vast* Kaalia of the Vast
Creature (17)
- 1 * Anger* Anger
- 1 * Purphoros, God of the Forge* Purphoros, God of the Forge
- 1 * Treasonous Ogre* Treasonous Ogre
- 1 * Boltwing Marauder* Boltwing Marauder
- 1 * Kolaghan, the Storm's Fury* Kolaghan, the Storm's Fury
- 1 * Dragonlord Kolaghan* Dragonlord Kolaghan
- 1 * Hellkite Charger* Hellkite Charger
- 1 * Lathliss, Dragon Queen* Lathliss, Dragon Queen
- 1 * Scourge of the Throne* Scourge of the Throne
- 1 * Balefire Dragon* Balefire Dragon
- 1 * Bladewing the Risen* Bladewing the Risen
- 1 * Dragon Mage* Dragon Mage
- 1 * Knollspine Dragon* Knollspine Dragon
- 1 * Skyline Despot* Skyline Despot
- 1 * Bogardan Hellkite* Bogardan Hellkite
- 1 * Utvara Hellkite* Utvara Hellkite
- 1 * Dragon Tyrant* Dragon Tyrant
Sorcery (23)
- 1 * Faithless Looting* Faithless Looting
- 1 * Magmatic Insight* Magmatic Insight
- 1 * Cathartic Reunion* Cathartic Reunion
- 1 * Demonic Tutor* Demonic Tutor
- 1 * Mana Seism* Mana Seism
- 1 * Night's Whisper* Night's Whisper
- 1 * Tormenting Voice* Tormenting Voice
- 1 * Wild Guess* Wild Guess
- 1 * Bonus Round* Bonus Round
- 1 * Buried Alive* Buried Alive
- 1 * Painful Truths* Painful Truths
- 1 * Toxic Deluge* Toxic Deluge
- 1 * Diabolic Tutor* Diabolic Tutor
- 1 * Past in Flames* Past in Flames
- 1 * Pirate's Pillage* Pirate's Pillage
- 1 * Dark Petition* Dark Petition
- 1 * Living Death* Living Death
- 1 * Mana Geyser* Mana Geyser
- 1 * Patriarch's Bidding* Patriarch's Bidding
- 1 * Reforge the Soul* Reforge the Soul
- 1 * Blasphemous Act* Blasphemous Act
- 1 * Dragonstorm* Dragonstorm
- 1 * Apex of Power* Apex of Power
Instant (10)
- 1 * Dark Ritual* Dark Ritual
- 1 * Rain of Filth* Rain of Filth
- 1 * Swords to Plowshares* Swords to Plowshares
- 1 * Cabal Ritual* Cabal Ritual
- 1 * Commune With Lava* Commune With Lava
- 1 * Desperate Ritual* Desperate Ritual
- 1 * Pyretic Ritual* Pyretic Ritual
- 1 * Terminate* Terminate
- 1 * Anguished Unmaking* Anguished Unmaking
- 1 * Seething Song* Seething Song
Artifact (11)
- 1 * Sol Ring* Sol Ring
- 1 * Boros Signet* Boros Signet
- 1 * Fellwar Stone* Fellwar Stone
- 1 * Helm of Awakening* Helm of Awakening
- 1 * Lightning Greaves* Lightning Greaves
- 1 * Orzhov Signet* Orzhov Signet
- 1 * Rakdos Signet* Rakdos Signet
- 1 * Swiftfoot Boots* Swiftfoot Boots
- 1 * Talisman of Indulgence* Talisman of Indulgence
- 1 * Primal Amulet* Primal Amulet
- 1 * Gilded Lotus* Gilded Lotus
Enchantment (3)
- 1 * Dragon Tempest* Dragon Tempest
- 1 * Impact Tremors* Impact Tremors
- 1 * Mana Flare* Mana Flare
Planeswalker (1)
- 1 * Jaya Ballard* Jaya Ballard
Land (34)
- 1 * Command Tower* Command Tower
- 1 * City of Brass* City of Brass
- 1 * Mana Confluence* Mana Confluence
- 1 * Nomad Outpost* Nomad Outpost
- 1 * Bloodstained Mire* Bloodstained Mire
- 1 * Wooded Foothills* Wooded Foothills
- 1 * Polluted Delta* Polluted Delta
- 1 * Windswept Heath* Windswept Heath
- 1 * Blood Crypt* Blood Crypt
- 1 * Sacred Foundry* Sacred Foundry
- 1 * Godless Shrine* Godless Shrine
- 1 * Smoldering Marsh* Smoldering Marsh
- 1 * Dragonskull Summit* Dragonskull Summit
- 1 * Clifftop Retreat* Clifftop Retreat
- 1 * Isolated Chapel* Isolated Chapel
- 1 * Luxury Suite* Luxury Suite
- 1 * Sulfurous Springs* Sulfurous Springs
- 1 * Battlefield Forge* Battlefield Forge
- 1 * Caves of Koilos* Caves of Koilos
- 7 MountainMountain
- 7 SwampSwamp
- 1 PlainsPlains
As we can see, it's a pretty straightforward black-red Storm list, splashing white. It has plenty of card draw, mana acceleration, and tutors, and the access to white give us some quality removal.
It's important to note that this is not a cEDH decklist. It's not optimized and it tries, to some degree, to interact with the table. Because of that, it will be somewhat inconsistent, but there's a line between 'strong' and 'competitive' that we must always try to avoid crossing. Otherwise, we'll have a bad competitive deck instead of a good non-cEDH deck.
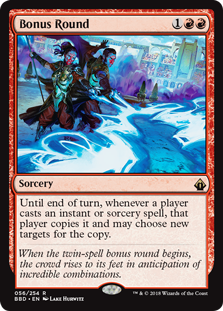
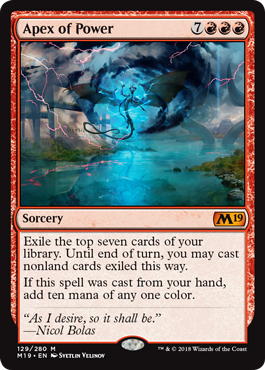
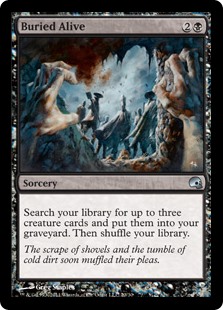
Three cards that deserve some special attention are: [card]Bonus Round[/card], [card]Apex of Power[/card] and [card]Buried Alive[/card]. The first is one of the fastest ways to go off; as it turns out, doubling all our rituals and tutors is a sure way to win in a Storm deck. Who could have guessed? The second, [card]Apex of Power[/card], is a very interesting 'impulse draw' effect. Since we plan on casting it from our hand, it's mana neutral, and could lead into even more rituals and thus an even higher Storm count, even giving us black mana in addition to all the red mana usually provided by ritual effects.
The last part is essential for our reanimation gameplan. Sure, we see a lot of cards and put them in the yard, but with [card]Buried Alive[/card] we put the right ones in the yard, like [card]Lathliss, Dragon Queen[/card] or even [card]Purpuros, God of the Forge[/card], to be retrieved by our other spells.
Methodology
Opening hands with this deck takes some practice to get right, and even then, it's not an easy task. Acceptable hands have a combination of mana, card draw, or tutor effects. A hand consisting heavily of any one of those might also be a good keep. Having one Dragon in hand might be a dead card, but multiples are a gameplan.
Early game consists of either developing our mana base or digging for the spells we need. Usually it's better to ramp first, since on the following turns we'll have more mana and might be able to do more. If mana isn't a problem (probably in a ritual-heavy hand) we should consider in casting draw spells earlier. Cost reducers are very valuable, but also draw some hate, so we should try to hold them until we're certain that we can go off in the very near future. Sometimes it's okay to just cast Kaalia early, just to be mana efficient and to bait a removal spell.
In the mid game, we have more and more access to mana, which usually means that we're one or two cards away from going off. By this point, we should have an idea which way we'll be summoning all our Dragons - through the grave or through the nine-mana Dragon portal - though admittedly, since the deck can be very explosive and unpredictable, we'll sometimes have to change lines. One thing to note is that changing is a one-way street. We can only change from Dragonstorm plan to the reanimation. The opposite is quite difficult, since we have no way to put our Dragons back into our deck to be summoned from the storm. There'll be some games that the optimal play is just [card]Dark Ritual[/card]ing a Dragon into play. Kaalia can also help us getting more Dragons into play, if all else fails.
The late game is very similar to the mid game, in the sense that we're very close to comboing off, if we haven't already. The main difference is the access to lands, instead of mana rocks, and the ability to play the random Dragons we top deck.
Epic Results
As I said before, this deck isn't trying to be the most optimized Storm deck it can be. Since it can get quite goldfishy, I'd suggest reading the room before playing it to make sure other folks will enjoy the deck even if you play Solitaire for a little while.
For upgrades to the Dragon suite, we could try [card]Steel Hellkite[/card] for more removal, [card]Dream Pillager[/card] for the extra draw (although it's somewhat risky, since it can exile multiple key Dragons), [card]Hellkite Tyrant[/card] for the extra mana it can provide, [card]Scalelord Reckoner[/card] for the [card]Karmic Justice[/card] effect, and [card]Skithiryx, the Blight Dragon[/card] for a faster beater.
For removal spells, it'll be more meta dependent, but adding cards like [card]Vandalblast[/card], [card]Merciless Eviction[/card], and even [card]Return to Dust[/card] can help us interact with our opponents' tools more easily.
Oh, and [card]Mizzix's Mastery[/card] can crack the game open for us in the later stages of the game. Lots of potential upgrades to be found here!
That’s it for this Epic Experiment! Please fell free to leave any suggestions in the comments section. Do you have any questions about the list? Which cards did you like? Which didn’t you? Was the Epic Experiment a success? Please let me know!
Your opinions are welcome. We love hearing what you think about Magic! We ask that you are always respectful when commenting. Please keep in mind how your comments could be interpreted by others. Personal attacks on our writers or other commenters will not be tolerated. Your comments may be removed if your language could be interpreted as aggressive or disrespectful. You may also be banned from writing further comments.
