Deathly Data
In the first article of this series, I presented a number of results regarding card effectiveness based on gameplay data from the Command Zone. What can be done with such data? Can we use this'information as a tool for deckbuilding? In this second installment of Pursuit of Knowledge, we will take a look at card effectiveness with the lens of Golgari. We;ll look at different card categories and try to design a deck that uses the best of the crop.
Why choose Golgari for this first deck tech? In the Command Zone gameplay data series, the Command Zone identified that decks that contained a combination of black and green had the highest win ratio among the games they surveyed. I also have a special relationship with Golgari, as the first EDH deck I created was built around [card]Savra, Queen of the Golgari[/card]. In a way, this deck tech will be a nostalgic journey.
There are 19 Golgari commanders available at time of writing. Of these 19 commanders, the Command Zone gameplay data contained decks for 14 of them. The most popular Golgari commander in EDH is [card]Meren of Clan Nel Toth[/card], with 3,538 decks ([card]The Gitrog Monster[/card] comes in second with 1,790 decks). In our list of effective Golgari cards, however, Meren is ranked 116th, whereas Gitrog is ranked 380th. In the Command Zone gameplay data, there were 15 Meren decks present out of 48 black-green decks. Meren is very popular, and for a good reasons. We will thus focus our attention on this graveyard specialist. We will build our Meren deck around the most prevalent Meren theme in EDHREC: Aristocrats.
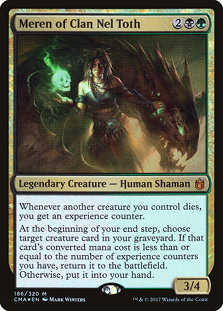
Our game plan will be to recur creatures with valuable ETB effects to help us gain an advantage over our opponents and eventually secure the win. Our primary focus in this deck will be to drain life from our opponents with cards like [card]Blood Artist[/card] and [card]Zulaport Cutthroat[/card], and with sacrifice outlets like [card]Phyrexian Altar[/card], [card]Viscera Seer[/card] and [card]High Market[/card].
The Command Zone gameplay data provides us rankings for 610 spells and 131 lands for the Golgari color identity. In order to identify the best cards to use for our deck, I have broken down the cards in categories. I will highlight the top performers in each category in its own table. The categories are:
- Ramp
- Card advantage
- Card manipulation
- Disruption
- Mass removal
- Core synergy: Aristocrats
- Core synergy: Graveyard interaction
- Standalone creatures
- Standalone non-creature spells
- Lands
The rank of each card in the tables with be listed beside the card name. The cards we select for the Meren deck will be highlighted in the table with a background color. We'll choose our cards based on ranking, although card synergy and the leveraging of the commander's strengths will also be taken into account. Additionally, some choices will be made to attain a manageable mana curve. On occasion, I'll select a card that was not ranked in the Command Zone gameplay survey. This might be because the card was released after the survey, or it might be that this card was not present in any decks, or not present enough that it could be ranked. When I select cards this way, I'll highlight it and explain why such choices were made.
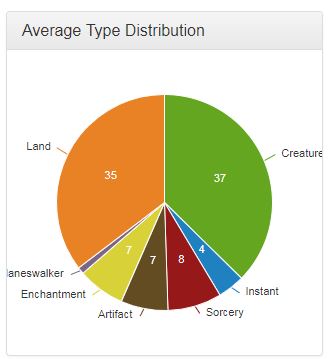
The Meren deck will be creature-centric, to leverage Meren's primary strength: creature graveyard recursion. For the different card types, we will mimic the average card type distribution for an Aristocrat-themed Meren deck based on EDHREC's data: 35 lands, 37 creatures, 2 planeswalkers, 7 enchantments, 7 artifacts, 8 sorceries, 4 instants.
Ramp
Ramp is an important aspect of all EDH decks. To allow for a quick start, we'll select ten ramp cards. Most of our ramp is in green.
| [card]Kodama’s Reach[/card] (2nd) | [card]Fyndhorn Elves[/card] (20th) | [card]Expedition Map[/card] (32nd) | [card]Chrome Mox[/card] (61st) |
| [card]Cultivate[/card] (3rd) | [card]Harrow[/card] (22nd) | [card]Farhaven Elf[/card] (35th) | [card]Elvish Mystic [/card](63th) |
| [card]Sakura-Tribe Elder[/card] (5th) | [card]Astral Cornucopia[/card] (24th) | [card]Nature's Lore[/card] (39th) | [card]Phyrexian Altar[/card] (66th) |
| [card]Skyshroud Claim[/card] (10th) | [card]Wood Elves[/card] (25th) | [card]Thought Vessel[/card] (46th) | [card]Elves of Deep Shadow[/card] (67th) |
| [card]Wayfarer’s Bauble[/card] (12th) | [card]Llanowar Elves[/card] (27th) | [card]Explosive Vegetation[/card] (51st) | [card]Golgari Signet[/card] (69th) |
We have selected [card]Expedition Map[/card] over [card]Astral Cornucopia[/card] to help us retrieve the [card]Cabal Coffers[/card] and [card]Urborg, Tomb of Yawgmoth[/card] lands for mana ramp. [card]Cabal Coffers[/card] is the best Golgari land ramp card with an effectiveness close to [card]Mana Crypt[/card], which sits at rank 108. [card]Ashnod's Altar[/card], ranked at 212nd did not make the cut. [card]Ashnod's Altar[/card] could be interesting if we had [card]Slimefoot, the Stowaway[/card] and [card]Doubling Season[/card] in our deck. This would provide us an automatic win combo.
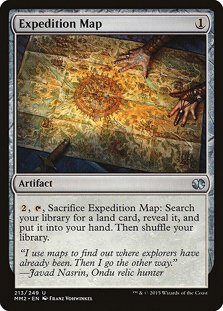
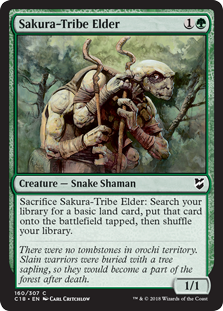
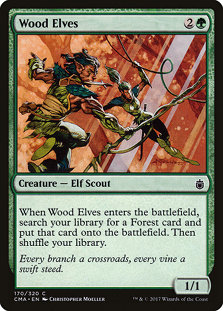
With Meren on the board, cards like [card]Sakura-Tribe Elder[/card] and [card]Wood Elves[/card] can be reused to double our ramping capability.
Card Advantage
In this section, we list the cards that will net a player card advantage. I like to have around ten of these cards, to avoid running into top deck situations. Black and green are excellent sources of card advantage, so we have many options at our disposal.
| [card]Skullclamp[/card] (7th) | [card]Phyrexian Reclamation[/card] (37th) | [card]Disciple of Bolas[/card] (95th) | [card]Sandstone Oracle[/card] (131st) |
| [card]Sylvan Library[/card] (11th) | [card]Syphon Mind[/card] (40th) | [card]Tamiyo's Journal[/card] (96th) | [card]Decree of Pain[/card] (132nd) |
| [card]Golgari Rot Farm[/card] | [card]Grim Haruspex[/card] (55th) | [card]Alhammarret's Archive[/card] (107th) | [card]Soul of the Harvest [/card] (134th) |
| [card]Harmonize[/card] (26th) | [card]Seasons Past[/card] (64th) | [card]Regal Force[/card] (111th) | [card]Rishkar's Expertise[/card] (153rd) |
| [card]Painful Truths[/card] (30th) | [card]Shamanic Revelations[/card] (76th) | [card]Zendikar Resurgent[/card] (119th) | [card]Kozilek, Butcher of Truth[/card] (156th) |
| [card]Praetor's Counsel[/card] (36th) | [card]Deathreap Ritual[/card] (86th) | [card]Deadbridge Chant[/card] (130th) | [card]Genesis[/card] (161th) |
Cards like [card]Disciple of Bolas[/card] were selected over better-ranked cards like [card]Praetor's Counsel[/card], [card]Seasons Past[/card], and [card]Shamanic Revelations[/card] to smooth out the mana curve. As a bonus, [card]Disciple of Bolas[/card] can interact with Meren through recursion, and provides an additional sacrifice outlet. [card]Kozilek, Butcher of Truth[/card] increases the average CMC of the deck, but its presence is mostly to protect from graveyard hate. Coupled with cards like [card]Survival of the Fittest[/card] or [card]Entomb[/card], it gives us a tool to shuffle the graveyard at instant speed (more explanation on this in the Graveyard Interaction section).
Card Manipulation
In this section, we list the cards that are used to tutor for the solutions often required during the course of the game. It is recommended to have a number of tutors for more flexibility. Here, we select four such tutors. Two of them are creature-based and could potentially be abused by Meren to tutor multiple cards.
| [card]Vampiric Tutor[/card] (3rd) | [card]Worldly Tutor[/card] (15th) | [card]Sensei's Divining Top[/card] (52nd) | [card]Jarad's Order[/card] (163rd) |
| [card]Demonic Tutor[/card] (6th) | [card]Green Sun's Zenith[/card] (33rd) | [card]Sidisi, Undead Vizier[/card] (62nd) | [card]Fierce Empath[/card] (191st) |
| [card]Increasing Ambition[/card] (8th) | [card]Chord of Calling[/card] (49th) | [card]Rune-Scarred Demon[/card] (82nd) | [card]Razaketh, the Foulblooded[/card] (197th) |
Disruption
Card in this category are used to disrupt our opponents. Black and green have access to a number of spells that can be used to destroy our opponents' best permanents. Most of our instants will come from this category.
| [card]Krosan Grip[/card] (13th) | [card]Abrupt Decay[/card] (50th) | [card]Strip Mine[/card] | [card]Scour from Existence[/card] (156th) |
| [card]Beast Within[/card] (14th) | [card]Shriekmaw[/card] (53rd) | [card]Curtains' Call[/card] (126th) | [card]Acidic Slime[/card] (166th) |
| [card]Nature's Claim[/card] (39th) | [card]Putrefy[/card] (54nd) | [card]Snuff Out[/card] (143th) | [card]Terastodon[/card] (167th) |
| [card]Hero's Downfall[/card] (47th) | [card]Dark Impostor[/card] (92nd) | [card]Murderous Cut[/card] (148th) | [card]Caustic Caterpillar[/card] (204th) |
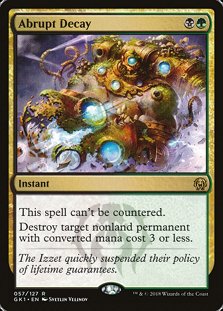
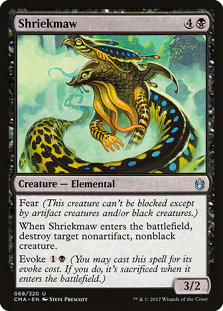
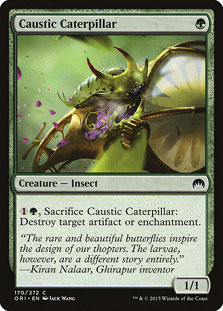
To leverage Meren's intrinsic recursion, we will chip in a couple of creatures that can remove pretty much any permanent other than planeswalker. [card]Acidic Slime[/card] and [card]Caustic Caterpillar[/card] are selected over better-ranked cards like [card]Putrefy[/card] to leverage Meren's graveyard recursion ability.
Mass Removal
In this category, we list the best mass removal spells available in black and green. We need these spells to handle situations where the board state gets out of hand. However, since we can rely on graveyard recursion to reuse our best disruption spells, we do not need to invest heavily in this category.
| [card]Toxic Deluge[/card] (42th) | [card]In Garruk's Wake[/card] (58th) | [card]Pernicious Deed[/card] (73rd) | [card]Deathbringer Regent[/card] (75th) |
| [card]Bane of Progress[/card] (48th) | [card]Crux of Fate[/card] (71st) | [card]Necromantic Selection[/card] (92nd) | [card]Decree of Pain[/card] (132th) |
We can afford a card like [card]Bane of Progress[/card] because, since our deck is creature-centric, it is low on artifacts and enchantments. We do not use any mana rocks for ramping, so blowing up all artifacts will not be detrimental to our our game plan.
[card]Pernicious Deed[/card] was selected over [card]Garruk's Wake[/card] and [card]Crux of Fate[/card] to get a more balanced mana curve.
Core Synergy: Aristocrats
In this category, we list all sacrifice outlets and cards that trigger when creatures die. This is the core of our deck. We need many sacrifice outlets for Meren to gain experience and start bringing back creatures directly to the battlefield.
| [card]Eldritch Evolution[/card] (16th) | [card]Mycoloth[/card] (60th) | [card]Black Market[/card] (97th) | [card]Falkenrath Noble[/card] (141st) |
| [card]Survival of the Fittest[/card] (19th) | [card]Sidisi, Undead Vizier[/card] (61st) | [card]Viscera Seer[/card] (103nd) | [card]Altar of Dementia[/card] (142nd) |
| [card]Zulaport Cutthroat[/card] (41st) | [card]Blood Artist[/card] (64th) | [card]Birthing Pod[/card] (107th) | [card]Demon of Dark Schemes [/card] (134th) |
| [card]Grave Pact[/card] (44th) | [card]Phyrexian Altar[/card] (66th) | [card]Evolutionary Leap[/card] (106th) | [card]Ashnod's Altar[/card] (212rd) |
| [card]High Market[/card] | [card]Spawning Pit[/card] (78th) | [card]Mazirek, Kraul Death Priest[/card] (108st) | [card]Plaguecrafter[/card] (~213nd) |
| [card]Butcher of Malakir[/card] (57th) | [card]Deathreap Ritual[/card] (86th) | [card]Trading Post[/card] (133th) | [card]Jarad, Golgari Lich Lord[/card] (227th) |
The main plan is to get our aristocrat friends, [card]Zulaport Cutthroat[/card], [card]Blood Artist[/card], and [card]Falkenrath Noble[/card] on the battlefield to start draining life out of our opponents while we perform our graveyard shenanigans with our sacrifice outlets.
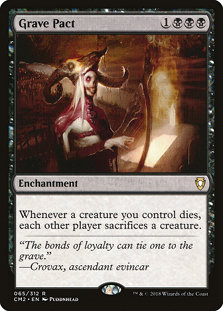
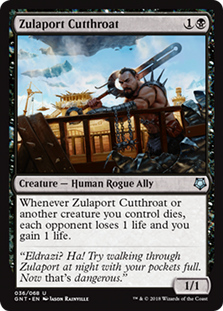
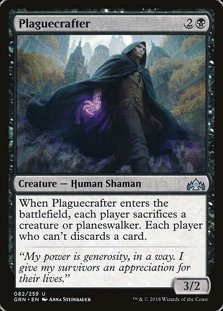
If at the same time, we can have a [card]Grave Pact[/card] and/or a [card]Butcher of Malakir[/card] on the battlefield, we will be able to contain our opponents' hordes.
Core Synergy: Reanimation
In this category, we list all cards that interact with the graveyard, either by populating it with cards from hand or library, or to make use of the cards it holds.
| [card]Eternal Witness[/card] (1st) | [card]Entomb[/card] (70th) | [card]Dread Summons[/card] (129th) | [card]Skullwinder[/card] (155th) |
| [card]Regrowth[/card] (29th) | [card]Dread Return[/card] (112th) | [card]Deadbridge Chant[/card] (130th) | [card]Genesis[/card] (161th) |
| [card]Hermit Druid[/card] (31st) | [card]Den Protector[/card] (117th) | [card]Altar of Dementia[/card] (142th) | [card]Jarad's Order[/card] (163rd) |
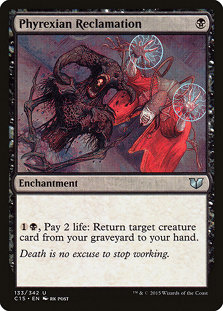
| [card]Phyrexian Reclamation[/card] (37th) | [card]Buried Alive[/card] (122nd) | [card]Dance of the Dead[/card] (144th) | [card]Chainer, Dementia Master[/card] (165th) |
| [card]Animate Dead[/card] (38th) | [card]Grisly Salvage[/card] (125th) | [card]Living Death[/card] (154th) | [card]Victimize[/card] (185th) |
I have added to the deck two cards that were not ranked with regards to the Command Zone gameplay data. The first is [card]Golgari Thug[/card]. This card gives us an alternate access to the graveyard and also provides an additional way to populate it with its Dredge ability. The second card, [card]Izoni, Thousand-Eyed[/card], was released in the Guilds of Ravnica set, so we do not have game data for this card. However, it synergizes well with this deck. As the game goes on, and more creatures make their way to the graveyard, Izoni's ETB effect gets bigger and bigger, creating more tokens when it enters the battlefield. The tokens it produces can also be used as sacrifice fodder.
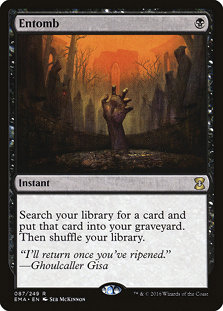
[card]Entomb[/card] can be used to bring a creature from the deck to the graveyard at instant speed. This can help protect our graveyard against graveyard hate. In response to an opponent attempting to exile your graveyard, searching for [card]Kozilek, Butcher of Truth[/card] with [card]Entomb[/card] will trigger the shuffling of your graveyard into your library. Granted, you will temporarily lose access to the cards in your graveyard, but at least they will still be available for later in the game.
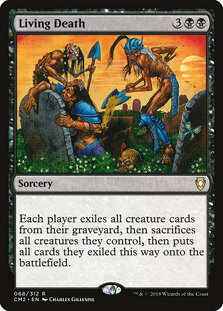
In my graveyard interaction card selection, I have not put too much emphasis on reanimation cards since Meren already does this really well. This is why I have left cards like [card]Animate Dead[/card], [card]Dance of the Dead[/card], [card]Dread Return[/card], [card]Genesis[/card], and [card]Victimize[/card] off my list. The only exception is [card]Living Death[/card], because it has potential to bring back a lot of creatures all at once.
Standalone Creatures
In this category, we list all creatures that work on their own or in concert with the commander.
| [card]Avenger of Zendikar[/card] (18th) | [card]Deathrite Shaman[/card] (104th) | [card]Verdant Force[/card] (160th) | [card]Anowon, the Ruin Sage[/card] (184th) |
| [card]Scavenging Ooze[/card] (45th) | [card]Craterhoof Behemoth[/card] (113rd) | [card]Vulturous Zombie[/card] (151st) | [card]Soul of New Phyrexia[/card] (192nd) |
| [card]Sangromancery[/card] (77th) | [card]Forgotten Ancient[/card] (115th) | [card]Sifter of Skulls[/card] (178th) | [card]Shaman of Forgotten Ways [/card] (200th) |
| [card]Kokusho, the Evening Star[/card] (83rd) | [card]Gonti, Lord of Luxury[/card] (124th) | [card]Malakir Bloodwitch[/card] (182nd) | [card]Corpsejack Menace[/card] (203rd) |
| [card]Gray Merchant of Asphodel[/card] (93rd) | [card]Rampaging Baloths[/card] (136th) | [card]Krosan Tusker[/card] (183rd) | [card]Siege Behemoth[/card] (205th) |
| [card]Abhorrent Overlord[/card] (101st) | [card]Wolfbriar Elemental[/card] (145th) | [card]Grave Titan[/card] (187th) | [card]Mindslicer[/card] (222nd) |
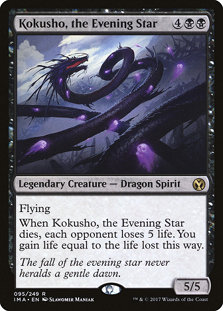
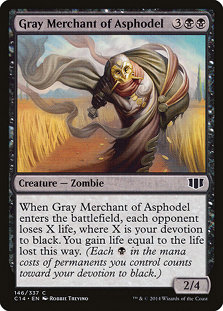
Cards like [card]Gray Merchant of Asphodel[/card] and [card]Kokusho, the Evening Star[/card] fit well with the Aristocrats strategy. [card]Scavenging Ooze[/card] and [card]Deathrite Shaman[/card] provides us the tool to protect ourselves from our opponents' graveyard recursion (don't do what I do!). [card]Soul of New Phyrexia[/card] provides some level of protection for our permanents.
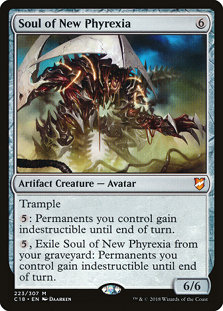
In this category, one card that is not rated and that I added in the final version of the deck is [card]Riftsweeper[/card]. This allows us to get back to the game cards that would be exiled. This is a good protection against exile actions and graveyard hate cards.
Standalone Noncreature Spells
In this category, we list all noncreature spells that work on their own or in concert with the commander.
| [card]Triumph of the Hordes[/card] (9th) | [card]Overrun[/card] (59th) | [card]Lashwrithe[/card] (126th) | [card]Gauntlet of Power[/card] (168th) |
| [card]Liliana of the Dark Realms[/card] (16th) | [card]Beastmaster Ascension[/card] (68th) | [card]Aetherflux Reservoir[/card] (137th) | [card]Whispersilk Cloak[/card] (169th) |
| [card]Arachnogenesis[/card] (23rd) | [card]Parallel Lives[/card] (88th) | [card]Paradox Engine[/card] (139th) | [card]Grave Betrayal[/card] (174th) |
| [card]Doubling Season[/card] (43rd) | [card]Primeval Bounty[/card] (91st) | [card]Rude Awakening[/card] (162nd) | [card]Mirage Mirror[/card] (188th) |
| [card]Whip of Erebos[/card] (56th) | [card]Torment of Hailfire[/card] (97th) | [card]God-Pharaoh's Gift[/card] (164th) | [card]Eldrazi Monument[/card] (195th) |
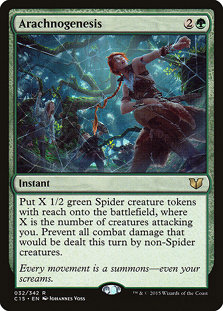
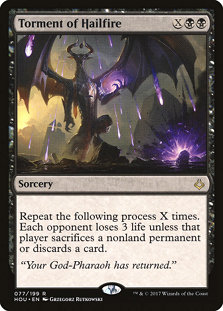
[card]Torment of Hailfire[/card] provides us a great life-draining finisher. [card]Arachnogenesis[/card] can dodge a final blow and generate tokens that can later be used for value.
I have not included cards like [card]Doubling Season[/card] or [card]Parallel Lives[/card] because, although there are some cards that produce tokens, the deck is soft in that respect. I also left out cards like [card]Triumph of the Hordes[/card], [card]Overrun[/card], and [card]Beastmaster Ascension[/card] because I don't expect our battlefield to be clogged with creatures most of the time.
Lands
The land base is pretty straightforward. We will dedicate about half of it to basic lands, and the rest will mostly be land cards that can provide mana fixing. There are two land cards that can contribute to the Aristocrats game plan: [card]High Market[/card] and [card]Westvale Abbey[/card].
| [card]Forest[/card] (1st) | [card]Wooded Foothills[/card] (10th) | [card]Scavenger Grounds[/card] (19th) | [card]Jungle Hollow[/card] (28th) |
| [card]Swamp[/card] (2nd) | [card]Temple of Malady (11th)[/card] | [card]Windswept Heath[/card] (20th) | [card]Cabal Coffers[/card] (29th) |
| [card]Command Tower (3rd)[/card] | [card]Reliquary Tower[/card] (12th) | [card]Treetop Village[/card] (21st) | [card]Command Beacon[/card] (30th) |
| [card]Blighted Woodlands (4th)[/card] | [card]Urborg, Tomb of Yawgmoth[/card] (13th) | [card]Jund Panorama[/card] (22nd) | [card]Drownyard Temple[/card] (31st) |
| [card]Overgrow Tomb[/card] (5th) | [card]Woodland Cemetery[/card] (14th) | [card]Marsh Flats[/card] (23rd) | [card]Terramorphic Expanse[/card] (32nd) |
| [card]Bojuka Bog[/card] (6th) | [card]Bloodstained Mire[/card] (15th) | [card]Strip Mine[/card] (24th) | [card]City of Brass[/card] (33rd) |
| [card]Verdant Catacombs[/card] (7th) | [card]Khalni Garden[/card] (16th) | [card]Vivid Grove[/card] (25th) | [card]Westvale Abbey[/card] (34th) |
| [card]Polluted Delta[/card] (8th) | [card]High Market[/card] (17th) | [card]Path of Ancestry[/card] (26th) | [card]Mirrorpool[/card] (35th) |
| [card]Golgari Rot Farm[/card] (9th) | [card]Exotic Orchard[/card] (18th) | [card]Gaea's Cradle[/card] (27th) | [card]Temple of the False God[/card] (36th) |
I have not selected fetch lands in my deck for budget reasons, but if you have access to these lands, they will be very helpful for mana fixing, especially [card]Verdant Catacombs[/card].
Putting It All Together
We have been able to tap from the best 200 black, green, and colorless cards to build a pretty decent Golgari deck. In doing this, we have also come up with templates that could be used to build decks for most of the Golgari commanders. The cards mentioned in this article are the best in their respective categories.
To build a deck around another green-black commander, like [card]Izoni, Thousand-Eyed[/card], we could use Meren's decklist as a starting point and add cards like [card]Triumph of the Hordes[/card], [card]Doubling Season[/card], [card]Overrun[/card], [card]Beastmaster Ascension[/card], [card]Parallel Lives[/card] to foster a tokens/go-wide strategy, then add cards like [card]Grisly Salvage[/card], [card]Deadbridge Chant[/card], and [card]Jarad's Order[/card] to bolster our graveyard, and finally add some graveyard recursion, to make best use of the available resources in the graveyard. To make room for these new cards, we would then remove a bunch of cards from the Aristocrats section that are not as relevant in Izoni's main deck objective (cards like [card]Birthing Pod[/card], [card]Viscera Seer[/card], [card]Falkenrath Noble[/card], [card]Plaguecrafter[/card], [card]Demon of Dark Schemes[/card], etc.).
Til Your Last Breath
View on ArchidektCommander (1)
- 1 Meren of Clan Nel TothMeren of Clan Nel Toth
Creatures (35)
- 1 Caustic CaterpillarCaustic Caterpillar
- 1 Deathrite ShamanDeathrite Shaman
- 1 Llanowar ElvesLlanowar Elves
- 1 Viscera SeerViscera Seer
- 1 Blood ArtistBlood Artist
- 1 RiftsweeperRiftsweeper
- 1 Sakura-Tribe ElderSakura-Tribe Elder
- 1 Scavenging OozeScavenging Ooze
- 1 Zulaport CutthroatZulaport Cutthroat
- 1 Eternal WitnessEternal Witness
- 1 Golgari ThugGolgari Thug
- 1 Grim HaruspexGrim Haruspex
- 1 PlaguecrafterPlaguecrafter
- 1 Wood ElvesWood Elves
- 1 Disciple of BolasDisciple of Bolas
- 1 Falkenrath NobleFalkenrath Noble
- 1 Forgotten AncientForgotten Ancient
- 1 Gonti, Lord of LuxuryGonti, Lord of Luxury
- 1 SangromancerSangromancer
- 1 Acidic SlimeAcidic Slime
- 1 Gray Merchant of AsphodelGray Merchant of Asphodel
- 1 Mazirek, Kraul Death PriestMazirek, Kraul Death Priest
- 1 MycolothMycoloth
- 1 ShriekmawShriekmaw
- 1 Sidisi, Undead VizierSidisi, Undead Vizier
- 1 Bane of ProgressBane of Progress
- 1 Demon of Dark SchemesDemon of Dark Schemes
- 1 Izoni, Thousand-EyedIzoni, Thousand-Eyed
- 1 Kokusho, the Evening StarKokusho, the Evening Star
- 1 Soul of New PhyrexiaSoul of New Phyrexia
- 1 Avenger of ZendikarAvenger of Zendikar
- 1 Butcher of MalakirButcher of Malakir
- 1 Rune-Scarred DemonRune-Scarred Demon
- 1 Craterhoof BehemothCraterhoof Behemoth
- 1 Kozilek, Butcher of TruthKozilek, Butcher of Truth
Artifacts (6)
- 1 Expedition MapExpedition Map
- 1 SkullclampSkullclamp
- 1 Wayfarer's BaubleWayfarer's Bauble
- 1 Altar of DementiaAltar of Dementia
- 1 Phyrexian AltarPhyrexian Altar
- 1 Birthing PodBirthing Pod
Instants (5)
- 1 EntombEntomb
- 1 Abrupt DecayAbrupt Decay
- 1 ArachnogenesisArachnogenesis
- 1 Beast WithinBeast Within
- 1 Krosan GripKrosan Grip
Sorceries (13)
- 1 Demonic TutorDemonic Tutor
- 1 Torment of HailfireTorment of Hailfire
- 1 Buried AliveBuried Alive
- 1 CultivateCultivate
- 1 Eldritch EvolutionEldritch Evolution
- 1 Kodama's ReachKodama's Reach
- 1 Toxic DelugeToxic Deluge
- 1 Dread SummonsDread Summons
- 1 HarmonizeHarmonize
- 1 Skyshroud ClaimSkyshroud Claim
- 1 Syphon MindSyphon Mind
- 1 Increasing AmbitionIncreasing Ambition
- 1 Living DeathLiving Death
Enchantments (5)
- 1 Phyrexian ReclamationPhyrexian Reclamation
- 1 Survival of the FittestSurvival of the Fittest
- 1 Sylvan LibrarySylvan Library
- 1 Pernicious DeedPernicious Deed
- 1 Grave PactGrave Pact
Lands (35)
- 1 Blighted WoodlandBlighted Woodland
- 1 Bojuka BogBojuka Bog
- 1 Cabal CoffersCabal Coffers
- 1 City of BrassCity of Brass
- 1 Command TowerCommand Tower
- 1 Exotic OrchardExotic Orchard
- 7 ForestForest
- 1 Golgari Rot FarmGolgari Rot Farm
- 1 High MarketHigh Market
- 1 Jund PanoramaJund Panorama
- 1 Jungle HollowJungle Hollow
- 1 Khalni GardenKhalni Garden
- 1 Overgrown TombOvergrown Tomb
- 1 Path of AncestryPath of Ancestry
- 1 Reliquary TowerReliquary Tower
- 1 Strip MineStrip Mine
- 8 SwampSwamp
- 1 Temple of MaladyTemple of Malady
- 1 Urborg, Tomb of YawgmothUrborg, Tomb of Yawgmoth
- 1 Vivid GroveVivid Grove
- 1 Westvale Abbey FlipWestvale Abbey Flip
- 1 Woodland CemeteryWoodland Cemetery
Tune in for the next article, where we'll take a look at Rakdos!
Your opinions are welcome. We love hearing what you think about Magic! We ask that you are always respectful when commenting. Please keep in mind how your comments could be interpreted by others. Personal attacks on our writers or other commenters will not be tolerated. Your comments may be removed if your language could be interpreted as aggressive or disrespectful. You may also be banned from writing further comments.
