Rakuno, Rakdos, Raktres
Barring decks with black and green in their color identity, the Command Zone found in their gameplay survey that decks with black and red in their color identity were the strongest. Although this extends to color combinations like Jund and Mardu, does this color pairing advantage translate to Rakdos? In this new installment of the Pursuit of Knowledge series, we will delve into the world of Rakdos. We will attempt to identify the cards that stand out in the black and red colors, create template of cards in different categories that can be reused to build other Rakdos decks, and use these templates to build a Rakdos commander deck. Card ranking, based on the Command Zone gameplay data, will be our first criteria to select the cards for our deck, but we will also take into account card synergy, card type distribution, and consider the mana curve to create a well-rounded deck.
There are 27 Rakdos commanders available at time of writing. The Rakdos guild does not have a solid front-runner like Golgari's [card]Meren of Clan Nel Toth[/card] with her 3,548 decks. Instead, Rakdos carries a number of less popular commanders, like [card]Rakdos, Lord of Riots[/card] (1,437 decks), [card]Olivia Voldaren[/card] (963 decks), and [card]Mogis, God of Slaughter[/card] (840 decks).
Looking at the Command Zone gameplay data, I realized that Rakdos is not as focused as Golgari. The graveyard is a central theme for most Golgari commanders, while the major Rakdos commanders seem to implement a mixture of different strategies. They can be aggressive at times, promote pain in some instances, be more focused on control, or make use of the graveyard.
The Command Zone gameplay data contains 43 decks spread amongst 15 different commanders. 492 spells and 136 lands can be ranked with some level of confidence in the Rakdos pool of cards. The tribes that have the best representation in black and red in the Command Zone gameplay data are the Vampire tribe and the Dragon tribe, although the focus is usually on one dominant color. [card]Bladewing the Risen[/card] with rank 110 in the Command Zone gameplay data is the only Rakdos commander in the list of 492 ranked cards. However, [card]Bladewing the Risen[/card] really only thrives in a Dragon tribal setting. Unfortunately, this tribe is not very well represented in the gameplay data (meaning, there are more effective cards to play than Dragons if we stick with the gameplay data). [card]Rakdos, Lord of Riots[/card] is the more popular Rakdos commander, but the Command Zone gameplay data seem to better support a commander like [card]Olivia Voldaren[/card] with her horde of Vampire supporters. [card]Olivia Voldaren[/card] will thus be our Rakdos representative.
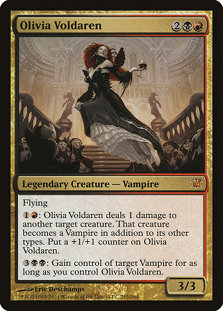
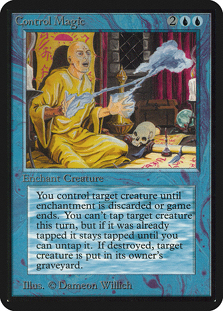
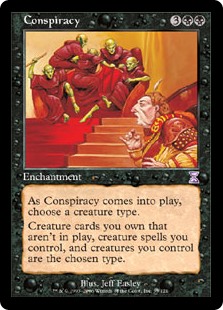
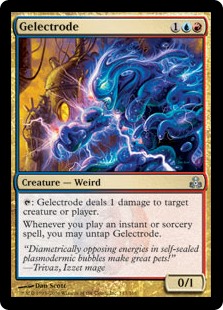
What can we say about Olivia? She represents one of the oldest archetype of Magic: pure control. She somehow blends [card]Control Magic[/card], [card]Conspiracy[/card] and [card]Gelectrode[/card].
 |  |  |
We will tailor our deck similar to the average EDHREC [card]Olivia Voldaren[/card] Vampire tribal deck, with a distribution that resembles the one below.
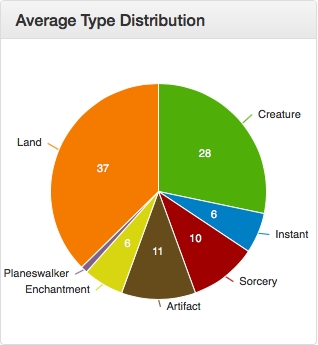
Although it is typical in an [card]Olivia Voldaren[/card] build to fully go tribal, I'd like to diversify a little bit to put more emphasis on the control aspect of her persona. In addition to the general categories presented in my previous article (ramp, card advantage, disruption, and mass removal), I will create a Vampire tribal category for the sake of this article, because, as you will later see, the best Vampires support Olivia's mission. I will also introduce a new category: Control.
Lets have a look at each of these categories. The shaded cells in the various tables are the cards that will make their way into our deck. The rank of each card will also be highlighted in the tables below.
Ramp
In a Rakdos environment, we do not have access to any of the good ramp cards that green provides. We need to rely a lot more on mana rocks.
| [card]Wayfarer’s Bauble[/card] (5th) | [card]Dowsing Dagger[/card] (37th) | [card]Cabal Coffers[/card] | [card]Nirkana Revenant[/card] (102nd) |
| [card]Astral Cornucopia[/card] (7th) | [card]Everflowing Chalice[/card] (38th) | [card]Crypt Ghast[/card] (60th) | [card]Magus of the Coffers[/card] (104th) |
| [card]Expedition Map[/card] (10th) | [card]Solemn Simulacrum[/card] (42nd) | [card]Basalt Monolith[/card] (67th) | [card]Ashnod's Altar[/card] (131st) |
| [card]Thought Vessel[/card] (18th) | [card]Mana Geyser[/card] (43rd) | [card]Rakdos Signet[/card] (69th) | [card]Gilded Lotus[/card] (141st) |
| [card]Chrome Mox[/card] (27th) | [card]Black Market[/card] (50th) | [card]Mox Diamond[/card] (82nd) | [card]Sword of the Animist[/card] (190th) |
| [card]Phyrexian Altar[/card] (30th) | [card]Mana Crypt[/card] (59th) | [card]Sol Ring[/card] (90th) | [card]Braid of Fire[/card] |
The main challenge with Olivia will be to give her access to the mana required to steal our opponents' creatures. Seven mana is an expensive proposition. In most decks, there are only a handful of creature that cost seven mana or more. Paying a total of seven mana with Olivia to steal someone's three-drop creature is not that efficient. If we want to stay ahead of the curve, we will need to find ways to either cheat the cost of Olivia's abilities, or build our mana pool in such way that we have an edge over our opponents in that respect.
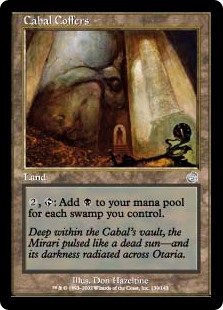 | 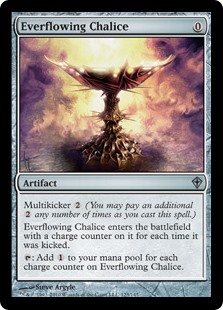 | 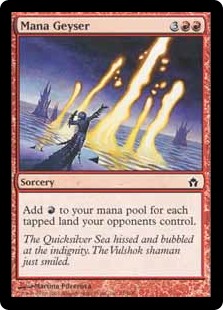 |
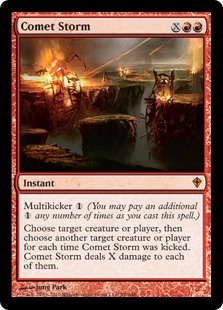
For these reasons, our mana base is designed to generate tons of mana. Cards like [card]Cabal Coffers[/card], [card]Everflowing Chalice[/card], [card]Black Market[/card], [card]Braid of Fire[/card], and [card]Mana Geyser[/card] have the potential to give us the mana boost to progress our board state while crippling our opponents' best resources. Access to a large mana base also allows us to play big X spells like [card]Torment of Hailfire[/card], [card]Comet Storm[/card], and [card]Magamquake[/card] with a potentially significant impact in the game.
A number of creatures will have abilities that can convert mana for value at instant speed. This will ensure our mana advantage does not go to waste.
Card Advantage/Filtering
I normally like to have access to ten card advantage/tutor effects to reduce my chances to be empty-handed in the context of the game. In this deck, however, there are other ways to get card advantage: through Olvia's abilities, through reanimation, and through our creatures' ETB effects. I have been lighter on card advantage/filtering for the deck list.
| [card]Vampiric Tutor[/card] (1st) | [card]Sensei's Divining Top[/card] (21st) | [card]Tamiyos's Journal[/card] (49th) | [card]Cathartic Reunion[/card] (95th) |
| [card]Demonic Tutor[/card] (2nd) | [card]Grim Haruspex[/card] (23rd) | [card]Alhammarret's Archive[/card] (55th) | [card]Magus of the Wheel[/card] (119th) |
| [card]Skullclamp[/card] (3rd) | [card]Sidisi, Undead Vizier[/card] (28th) | [card]Necropotence[/card] (68th) | [card]Harvester of Souls[/card] (120th) |
| [card]Increasing Ambition[/card] (4th) | [card]Rune-Scarred Demon[/card] (39th) | [card]Diabolic Intent[/card] (70th) | [card]Razaketh, the Foulblooded[/card] (124th) |
| [card]Dark Petition[/card] (8th) | [card]Liliana Vess[/card] (44th) | [card]Sandstone Oracle[/card] (75th) | [card]Staff of Nin[/card] (173rd) |
| [card]Painful Truths[/card] (9th) | [card]Imperial Recruiter[/card] (53rd) | [card]Decree of Pain[/card] (76th) | [card]Damnable Pact[/card] (164th) |
| [card]Phyrexian Reclamation[/card] (12th) | [card]Wheel of Fortune[/card] (65th) | [card]Kozilek, Butcher of Truth[/card] (92nd) | [card]Bloodgift Demon[/card] (174th) |
| [card]Syphon Mind[/card] (14th) | [card]Disciple of Bolas[/card] (48th) | [card]Scroll Rack[/card] (93rd) | [card]Etali, Primal Storm[/card] |
[card]Phyrexian Reclamation[/card] allows us to recur our creatures. [card]Liliana Vess[/card] can either be used as a tutor or to slowly drain the cards from our opponents' hand. Her ultimate fits well with this deck. [card]Damnable Pact[/card] can either fill our hand with cards or could be used to drain life from one of our opponents.
Disruption
This category encompasses cards used for target removal or disrupting your opponents' plans. Five to eight cards should be secured from this category to give you a chance to react to threats that impedes your plan.
| [card]Liliana of the Dark Realms[/card] (6th) | [card]Strip Mine[/card] | [card]Scour from Existence[/card] (94th) | [card]Spine of Ish Sah[/card] (156th) |
| [card]Hero’s Downfall[/card] (19th) | [card]Terminate[/card] (66th) | [card]Dualcaster Mage[/card] (101th) | [card]Ulamog, Ceaseless Hunger[/card] (157th) |
| [card]Reverberate[/card] (20th) | [card]Curtains' Call[/card] (72nd) | [card]Ingot Chewer[/card] (126th) | [card]Murder[/card] (179th) |
| [card]Shriekmaw[/card] (22nd) | [card]Snuff Out[/card] (86th) | [card]Fork[/card] (137th) | [card]Tragic Slip[/card] (184th) |
| [card]Dark Impostor[/card] (45th) | [card]Murderous Cut[/card] (88th) | [card]Noxious Gearhulk[/card] (140th) | [card]Wretched Confluence[/card] (196th) |
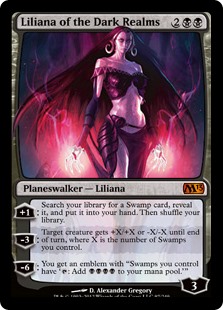
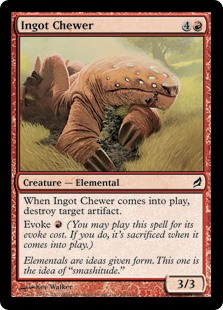
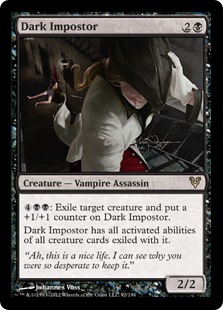
[card]Liliana of the Dark Realms[/card] can be handy to get rid of indestructible creatures, but can also be used to buff one of your creatures. Her ability to search for [card]Swamp[/card] cards could prove to be useful to ensure you never miss a land drop, and her ultimate would provide a big boost of mana for the rest of the game. [card]Ingot Chewer[/card] is one of the cheapest artifact removal cards in the format and has potential to be abused through flickering and reanimation. We can also repeatedly remove the most tenacious creatures with [card]Dark Impostor[/card].
 |  |  |
Given the control aspect of the deck, I have chosen to only include one creature removal and one permanent removal spell at instant speed.
Mass Removal
Mass removal is important in a control deck to slow down our opponents' while we establish our board position.
| [card]Toxic Deluge[/card] (16th) | [card]Necromantic Selection[/card] (33 | [card]Chain Reaction[/card] (58th) | [card]Mutilate[/card] (125th) |
| [card]In Garruk’s Wake[/card] (26th) | [card]Deathbringer Regent[/card] (34th) | [card]Decree of Pain[/card] (76th) | [card]Molten Disaster[/card] (135th) |
| [card]Crux of Fate[/card] (32nd) | [card]Volcanic Vision[/card] (57th) | [card]Earthquake[/card] (122nd) | [card]Magmaquake[/card] (161st) |
Red provides its own list of removal, and one that complements our decklist well. [card]Molten Disaster[/card] and [card]Magmaquake[/card] deal damage to non-flying creatures. Since a good portion of our creatures can fly, including our commander, this effect on our side of the board will not be as dramatic.
Core Synergy: Control
The control category contains cards that supplement Olivia's strategy of stealing our opponents' permanents. This sort of redundancy removes a lot of stress from the commander to perform the core strategy.
| [card]Zealous Conscripts[/card] (78th) | [card]Grave Betrayal[/card] (103rd) | [card]Hellkite Tyrant[/card] (143th) | [card]Beacon of Unrest[/card] (227th) |
| [card]Demon of Dark Schemes[/card] (89th) | [card]Captivating Vampire[/card] (130th) | [card]Sepulchral Primordial[/card] (155th) | [card]Geth, Lord of the Vault[/card] (237th) |
| [card]Chainer, Dementia Master[/card] (98th) | [card]Molten Primordial[/card] (146th) | [card]Mindclaw Shaman[/card] (168th) | [card]Thrilling Encore[/card] |
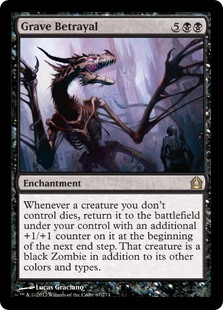
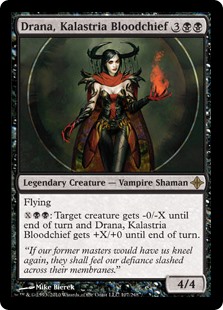
With [card]Grave Betrayal[/card], [card]Drana, Kalastria Bloodchief[/card] becomes Olivia's [card]Splinter Twin[/card]. Not because of Splinter Twin's effect, but because Drana will effectively copy Olivia's plan to bite all creatures and bring them under our control. Since Olivia brings our opponents' creatures back as Vampires, [card]Captivating Vampire[/card]'s requirement to have five Vampires on board to take control of other players' creatures should not be too hard to achieve. Olivia's ping ability can also be used to turn our own non-Vampire creatures into Vampires if need be.
 | 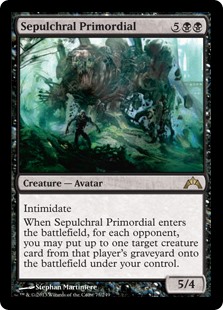 |  |
Several creatures leverage our opponents' graveyards: [card]Sepulchral Primordial[/card], [card]Geth, Lord of the Vault[/card], and [card]Chainer, Dementia Master[/card].
Core Synergy: Vampire Tribal
The core of our creatures will come form the Vampire tribe. These are some of the best ranked cards in the Command Zone gameplay Rakdos card pool. In addition, several Vampires in the list synergize with our strategy, either participating in the control aspect of the deck, or helping us ramp the mana.
| [card]Butcher of Malakir[/card] (25th) | [card]Nirkana Revenant[/card] (102nd) | [card]Pawn of Ulamog[/card] (145th) | [card]Yahenni, Undying Partisan[/card] (229th) |
| [card]Blood Artist[/card] (29th) | [card]Malakir Bloodwitch[/card] (108th) | [card]Metallic Mimic[/card] (158th) | [card]Drana, Liberator of Malakir[/card] (248th) |
| [card]Sangromancer[/card] (35th) | [card]Anowon, the Ruin Sage[/card] (111th) | [card]Bloodghast[/card] (182nd) | [card]Bloodline Necromancer[/card] (255th) |
| [card]Dark Impostor[/card] (45th) | [card]Captivating Vampire[/card] (130th) | [card]Coat of Arms[/card] (204th) | [card]Blade of the Bloodchief[/card] (288th) |
| [card]Viscera Seer[/card] (54th) | [card]Drana, Kalastria Bloodchief[/card] (138th) | [card]Herald's Horn[/card] (211th) | [card]Kalitas, Traitor of Ghet[/card] (340th) |
| [card]Falkenrath Noble[/card] (83rd) | [card]Bloodline Keeper[/card] (139th) | [card]Vampire Nighthawk[/card] (212th) | [card]Stromkirk Captain[/card] |
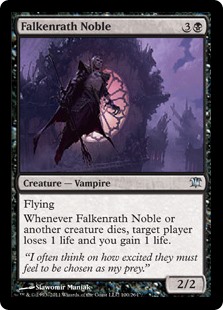
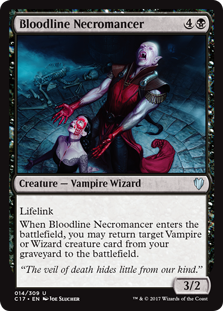
Among the Vampires selected for the deck, we have a mixture of aristocrat, reanimation, and disruption strategies. [card]Viscera Seer[/card] and [card]Yahenni, Undying Partisan[/card] provide a sacrifice outlet that can be useful to get rid of creatures that would otherwise go back to their owners if Olivia dies. [card]Sangromancer[/card], [card]Blood Artist[/card], [card]Malakir Bloodwitch[/card], and [card]Falkenrath Noble[/card] could help us stay afloat if we spend too much of our life total to pay for the costs of cards like [card]Toxic Deluge[/card] or [card]Phyrexian Reclamation[/card].
 |  |  |
The only creature that was added to the list that was not ranked is [card]Stormkirk Captain[/card]. This lord probably has a rank similar to [card]Metallic Mimic[/card].
Standalone Creatures
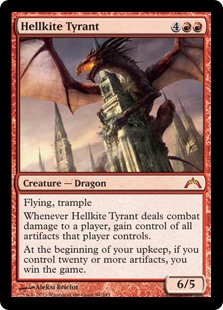
Standalone creature spells are creature spells that do not belong to any of the previous categories, that work on their own or in concert with the commander. Finally, [card]Hellkite Tyrant[/card] expands control to artifacts.
| [card]Zulaport Cutthroat[/card] (15th) | [card]Godo, Bandit Warlord[/card] (62nd) | [card]Sifter of Skulls[/card] (105th) | [card]Ob Nixilis, Unshackled[/card] (150th) |
| [card]Kokusho, the Evening Star[/card] (40th) | [card]Knollspine Dragon[/card] (64th) | [card]Bladewing the Risen[/card] (110th) | [card]Inferno Titan[/card] (159th) |
| [card]Scourge of Valkas[/card] (41st) | [card]Gonti, Lord of Luxury[/card] (71st) | [card]Grave Titan[/card] (115th) | [card]Tyrant's Familiar[/card] (165th) |
| [card]Gray Merchant of Asphodel[/card] (46th) | [card]Purphoros, God of the Forge[/card] (79th) | [card]Soul of New Phyrexia[/card] (118th) | [card]Myojin of Night's Reach[/card] (167th) |
| [card]Abhorrent Overlord[/card] (52nd) | [card]Dragon Mage[/card] (85th) | [card]Mindslicer[/card] (133th) | [card]Hoarding Dragon[/card] (169th) |
| [card]Kiki-Jiki, Mirror Breaker[/card] (56th) | [card]Utvara Hellkite[/card] (96th) | [card]Stuffy Doll[/card] (144th) | [card]Hangarback Walker[/card] (180th) |
[card]Kiki-Jiki, Mirror Breaker[/card] serves as an enabler for creatures that exercise control or disruption when entering the battlefield. Such is the case for creatures like [card]Sepulchral Primordial[/card] or [card]Ingot Chewer[/card]. The classic combo [card]Kiki-Jiki, Mirror Breaker[/card] + [card]Zealous Conscripts[/card] is also a guaranteed win if not disrupted.
[card]Soul of New Phyrexia[/card] protects the board from removal.
Standalone Spells
Standalone spells are non-creature spells that do not belong to any of the previous categories, that work on their own or in concert with the commander.
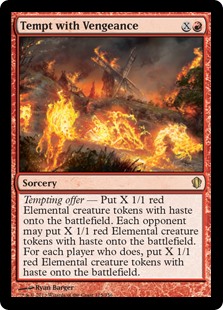
| [card]Grave Pact[/card] (17th) | [card]Aetherflux Reservoir[/card] (80th) | [card]Tempt with Vengeance[/card] (128th) | [card]Goblin Bombardment[/card] (191st) |
| [card]Spawning Pit[/card] (36th) | [card]Paradox Engine[/card] (81st) | [card]Gratuitous Violence[/card] (136th) | [card]Bonehoard[/card] (195th) |
| [card]Panharmonicon[/card] (47th) | [card]Whispersilk Cloak[/card] (100th) | [card]Nim Deathmantle[/card] (142nd) | [card]Helm of the Host[/card] (198th) |
| [card]Torment of Hailfire[/card] (51st) | [card]Increasing Vengeance[/card] (106th) | [card]Sword of Kaldra[/card] (153rd) | [card]Crawlspace[/card] (216th) |
| [card]Dread Return[/card] (61st) | [card]Comet Storm[/card] (112th) | [card]Cauldron of Souls[/card] (134th) | [card]Promise of Power[/card] (222nd) |
| [card]Worst Fears[/card] (63th) | [card]Mirage Mirror[/card] (116th) | [card]Smuggler's Copter[/card] (160th) | [card]Outpost Siege[/card] (223rd) |
| [card]Lashwrithe[/card] (73rd) | [card]Thaumatic Compass[/card] (117th) | [card]Sword of War and Peace[/card] (163rd) | [card]No Mercy[/card] (224th) |
| [card]Trading Post[/card] (77th) | [card]Eldrazi Monument[/card] (121st) | [card]Trailblazer's Boots[/card] (166th) | [card]Waste Not[/card] (230th) |
When our opponent realize that we can steal their best creatures, Olivia will likely become a target. Cards like [card]Soul of New Phyrexia[/card], [card]Cauldron of Souls[/card], [card]Nim Deathmantle[/card], and [card]Dread Return[/card] will be a good complement to [card]Phyrexian Reclamation[/card] and [card]Command Beacon[/card] to make Olivia and any of our other creatures more resilient to targeted or mass removal.
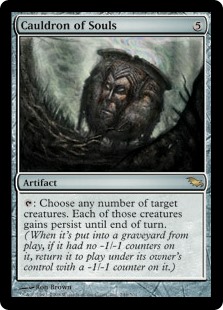 |  |  |
If a sacrifice outlet like [card]Phyrexian Altar[/card] is available on board along with [card]Cauldron of Souls[/card], it will be possible to abuse one of the creatures with ETB effect. You could gradually bring back all creatures from your opponents' graveyard at no cost with a card like [card]Sepulchral Primordial[/card]. Olivia can ping herself to remove the -1/-1 counter added to her from Persist.
One card that is not listed in the above table because it is ranked lower at rank 294, but which is still included in our deck, is [card]Rings of Brighthearth[/card]. This card allows us to cheat the mana costs of our more expensive abilities, like [card]Dark Impostor[/card], [card]Drana, Kalastria Bloodchief[/card], or [card]Olivia Voldaren[/card].
Lands
For the land package, we select the top ranked lands (with the exception of most of the fetch lands, for budgetary reasons; they can be added if you have access to them). We replace Cinder Barrens with [card]Canyon Slough[/card], a better replacement, and we add [card]Smoldering Marsh[/card], which was not ranked in our land pool.
[card]Command Beacon[/card] may be useful if Olivia becomes is a repeated target in the game. [card]Mirrorpool[/card] may be converted into a creature that has an interesting ETB to take control of one of your opponents' permanents.
| [card]Swamp[/card] (1st) | [card]Bloodstained Mire[/card] (9th) | [card]Jund Panorama[/card] (17th) | [card]Drownyard Temple[/card] (25th) |
| [card]Command Tower[/card] (2nd) | [card]Arid Mesa[/card] (10th) | [card]Marsh Flats[/card] (18th) | [card]Terramorphic Expanse[/card] (26th) |
| [card]Bojuka Bog[/card] (3rd) | [card]High Market[/card] (11th) | [card]Strip Mine[/card] (19th) | [card]City of Brass[/card] (27th) |
| [card]Verdant Catacombs[/card] (4th) | [card]Exotic Orchard[/card] (12th) | [card]Path of Ancestry[/card] (20th) | [card]Westvale Abbey[/card] (28th) |
| [card]Polluted Delta[/card] (5th) | [card]Blood Crypt[/card] (13th) | [card]Akoum Refuge[/card] (21st) | [card]Mirrorpool[/card] (29th) |
| [card]Wooded Foothills[/card] (6th) | [card]Scavenger Grounds[/card] (14th) | [card]Cinder Barrens[/card] (22nd) | [card]Temple of the False God[/card] (30th) |
| [card]Reliquary Tower[/card] (7th) | [card]Scalding Tarn[/card] (15th) | [card]Cabal Coffers[/card] (23rd) | [card]Smoldering Marsh[/card] |
| [card]Urborg, Tomb of Yawgmoth[/card] (8th) | [card]Mountain[/card] (16th) | [card]Command Beacon[/card] (24th) | [card]Canyon Slough[/card] |
Putting It All Together
Using the best of the class, we are now ready to take over the world! Hopefully, the different tables presented in this article will help you build many more Rakdos decks. Next article, we will take a look at Simic. If you have some preference on the Simic commander to build around, leave a message in the comments section.
Was Theirs
View on ArchidektCommander (1)
- 1 Olivia VoldarenOlivia Voldaren
Creatures (28)
- 1 * Viscera Seer* Viscera Seer
- 1 * Blood Artist* Blood Artist
- 1 * Bloodghast* Bloodghast
- 1 * Captivating Vampire* Captivating Vampire
- 1 * Dark Impostor* Dark Impostor
- 1 * Drana, Liberator of Malakir* Drana, Liberator of Malakir
- 1 * Pawn of Ulamog* Pawn of Ulamog
- 1 * Stromkirk Captain* Stromkirk Captain
- 1 * Yahenni, Undying Partisan* Yahenni, Undying Partisan
- 1 * Bloodline Keeper* Bloodline Keeper
- 1 * Crypt Ghast* Crypt Ghast
- 1 * Falkenrath Noble* Falkenrath Noble
- 1 * Sangromancer* Sangromancer
- 1 * Anowon, the Ruin Sage* Anowon, the Ruin Sage
- 1 * Bloodline Necromancer* Bloodline Necromancer
- 1 * Chainer, Dementia Master* Chainer, Dementia Master
- 1 * Drana, Kalastria Bloodchief* Drana, Kalastria Bloodchief
- 1 * Ingot Chewer* Ingot Chewer
- 1 * Kiki-Jiki, Mirror Breaker* Kiki-Jiki, Mirror Breaker
- 1 * Malakir Bloodwitch* Malakir Bloodwitch
- 1 * Zealous Conscripts* Zealous Conscripts
- 1 * Geth, Lord of the Vault* Geth, Lord of the Vault
- 1 * Nirkana Revenant* Nirkana Revenant
- 1 * Soul of New Phyrexia* Soul of New Phyrexia
- 1 * Butcher of Malakir* Butcher of Malakir
- 1 * Molten Primordial* Molten Primordial
- 1 * Sepulchral Primordial* Sepulchral Primordial
- 1 * Ulamog, the Ceaseless Hunger* Ulamog, the Ceaseless Hunger
Artifacts (10)
- 1 * Everflowing Chalice* Everflowing Chalice
- 1 * Expedition Map* Expedition Map
- 1 * Skullclamp* Skullclamp
- 1 * Wayfarer's Bauble* Wayfarer's Bauble
- 1 * Dowsing Dagger* Dowsing Dagger
- 1 * Nim Deathmantle* Nim Deathmantle
- 1 * Ashnod's Altar* Ashnod's Altar
- 1 * Basalt Monolith* Basalt Monolith
- 1 * Rings of Brighthearth* Rings of Brighthearth
- 1 * Cauldron of Souls* Cauldron of Souls
Instants (7)
- 1 * Vampiric Tutor* Vampiric Tutor
- 1 * Comet Storm* Comet Storm
- 1 * Magmaquake* Magmaquake
- 1 * Reverberate* Reverberate
- 1 * Terminate* Terminate
- 1 * Thrilling Encore* Thrilling Encore
- 1 * Scour from Existence* Scour from Existence
Sorceries (11)
- 1 * Tempt with Vengeance* Tempt with Vengeance
- 1 * Damnable Pact* Damnable Pact
- 1 * Demonic Tutor* Demonic Tutor
- 1 * Molten Disaster* Molten Disaster
- 1 * Torment of Hailfire* Torment of Hailfire
- 1 * Toxic Deluge* Toxic Deluge
- 1 * Dread Return* Dread Return
- 1 * Syphon Mind* Syphon Mind
- 1 * Mana Geyser* Mana Geyser
- 1 * Volcanic Vision* Volcanic Vision
- 1 * Decree of Pain* Decree of Pain
Enchantments (5)
- 1 * Phyrexian Reclamation* Phyrexian Reclamation
- 1 * Braid of Fire* Braid of Fire
- 1 * Black Market* Black Market
- 1 * No Mercy* No Mercy
- 1 * Grave Betrayal* Grave Betrayal
Planeswalkers (2)
- 1 * Liliana of the Dark Realms* Liliana of the Dark Realms
- 1 * Liliana Vess* Liliana Vess
Lands (36)
- 1 * Akoum Refuge* Akoum Refuge
- 1 * Blood Crypt* Blood Crypt
- 1 * Bloodstained Mire* Bloodstained Mire
- 1 * Bojuka Bog* Bojuka Bog
- 1 * Cabal Coffers* Cabal Coffers
- 1 * Canyon Slough* Canyon Slough
- 1 * City of Brass* City of Brass
- 1 * Command Beacon* Command Beacon
- 1 * Command Tower* Command Tower
- 1 * Exotic Orchard* Exotic Orchard
- 1 * High Market* High Market
- 1 * Jund Panorama* Jund Panorama
- 1 * Mirrorpool* Mirrorpool
- 5 MountainMountain
- 1 * Path of Ancestry* Path of Ancestry
- 1 * Smoldering Marsh* Smoldering Marsh
- 1 * Strip Mine* Strip Mine
- 14 SwampSwamp
- 1 * Urborg, Tomb of Yawgmoth* Urborg, Tomb of Yawgmoth
Your opinions are welcome. We love hearing what you think about Magic! We ask that you are always respectful when commenting. Please keep in mind how your comments could be interpreted by others. Personal attacks on our writers or other commenters will not be tolerated. Your comments may be removed if your language could be interpreted as aggressive or disrespectful. You may also be banned from writing further comments.
